
So I completed my first lego technic build with my son! We built the Lego 42138 build, which is the green Mustang pull-back model building kit.
Contents
Something I have been looking at for some time now is the lego technic cars. I really liked the idea of building one, then I was lucky enough that my partner surprised me with one for my birthday.
She gave me the Lego technic Ford Mustang Shelby GT500, and what a great choice she made as Ford Mustangs are a favorite of mine. So now I finally got my hands on a lego technic Mustang I thought I would share my experience of building the car, and if I think it was worth it.
The Lego 42138 build
So the first thing I did was open the box and poured all of its contents onto the floor, which my son kindly helped assist with.
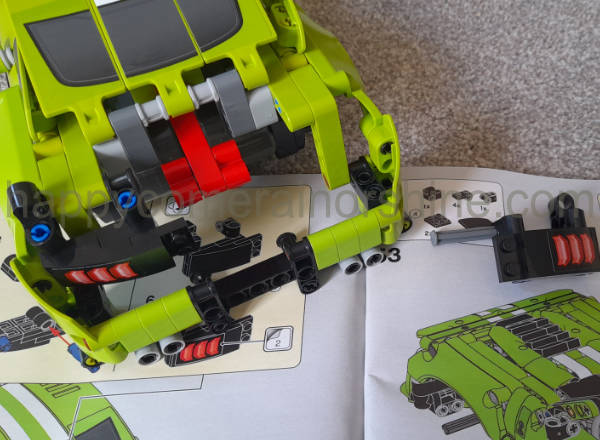
Next, I had a little flick through the Lego technic instructions to see how complex it looked to build the Shelby GT500 model. Seeing as this is the first time I have ever built a lego technic first impressions were that I thought it did look a little complex, especially seeing as there are 166 steps to building the car. But the age range is 9+ so I’m sure it’s easy enough to do for the younger generation!
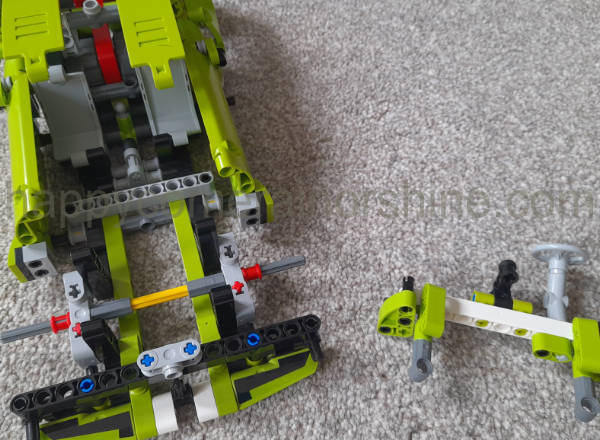
Now begins the fun part where we got to put together the parts. Luckily, I had my little assistant helping me figure out which lego parts I needed, and he very much enjoyed helping build the first section of the Mustang.
Although he is currently 3 and a half, he had great fun as he felt included. This section involved building the base of the car and straight away he found the tires and used them as a pair of goggles.
Now that we had built the bottom section of the car it was time to start building the rear bumper, putting the doors on, and the part he loved the most which was attaching the steering wheel.
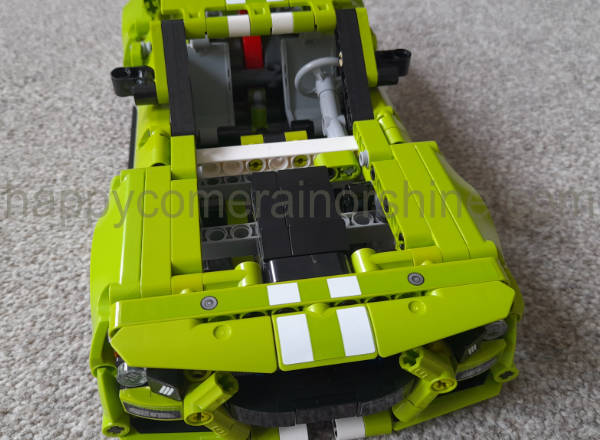
Next, we had to put together the engine, and place on a few more stickers and other parts. And as you can see the lego technic mustang was coming along nicely.

Next up was to build the front windscreen area of the Mustang Shelby GT500 and add the wing mirrors. And you can see we have added a few more parts to the front bumper of the car.
It was then time to put on the rear tail lights, almost finishing off the rear look. All it was missing now was the nice spoiler, which we added shortly.
Finally the part my son had been waiting for patiently was time to put the wheels onto the car. He helped fit the tires onto the alloys, which we then fitted to the vehicle.
Once fitted it was time to admire the lego technic mustang that we had built together and let him play with it.
As it is a pull-back model he took great enjoyment in pulling it back, letting go and it crashing into our wall!
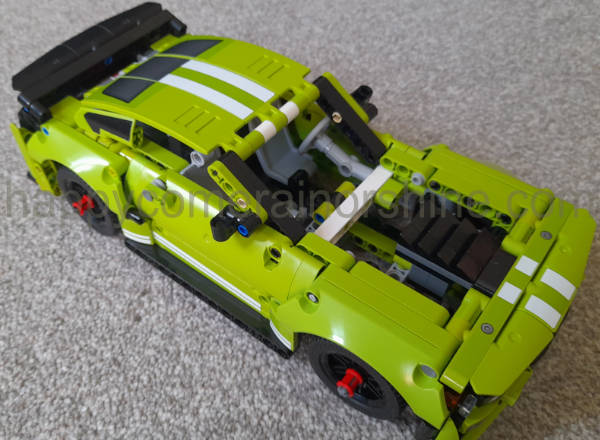
Below is a picture of the finished car without the bonnet attached, as little one liked it better without. I believe we had fitted everything in the correct place, but either way, the car works great and looks awesome.
Difficulty
The time it took to build was across 4 days, and we spent around 1 and a half hours each day. So it took us about 6 hours to build overall.
I did have to double-check the instructions a few times and may have found it a little difficult at times, but it is distracting having a 3-year-old helper. He did very well though and really enjoyed it. I probably found it harder as when his attention span began to run out, he would run off with some of the parts.
Summary of Lego Technic Ford Mustang Build
It was a fun little project to build with your kids and if you are thinking about purchasing the lego technic mustang Shelby gt500 I would personally recommend it.
Once it’s fully built you can pull back the car and use the key that you plug into the back to release it, so it’s great fun! I actually removed the part that is used to launch the technic mustang so instead, you can just pull the car back and release the car for it to go.